How to stitch and turn a fabric tube
One of the best bits about sewing for yourself is that you can use the details in the design to personalise what you are sewing. Mixing and matching your fabrics is a great way to do this, and I love using coordinating fabrics to add interest to whatever I am making. What I don’t love, however, is spending ages making simple things like fabric ties or binding! This photo tutorial shows my favourite method for stitching and turning a fabric tube.

Fabric tubes are useful when you want to create ties or button loops in a fabric that coordinates or matches your project. They can be made from strips of fabric cut on the straight grain, so are not wasteful, and don’t need any interfacing. I usually make mine at 1/2” wide, but you can use the same technique to make them any width.
You can buy various tools to help you turn tubes, but for once I haven’t tried them (I do usually love a gadget!). I do have a big reel of waxed linen cord, bought cheaply on the internet, and it is strong enough to do the job nicely. I store mine next to my sewing machine so it is on hand for when I need it. I have the feeling I will be using the same reel for the rest of my sewing life!
To stitch and turn a fabric tube (1/2” wide), you will need:
Fabric strip 1 1/2” wide by your chosen length (mine was 12”), a strong cord, like a waxed linen thread, a seam ripper, a 1/4” machine foot (optional)
Step 1
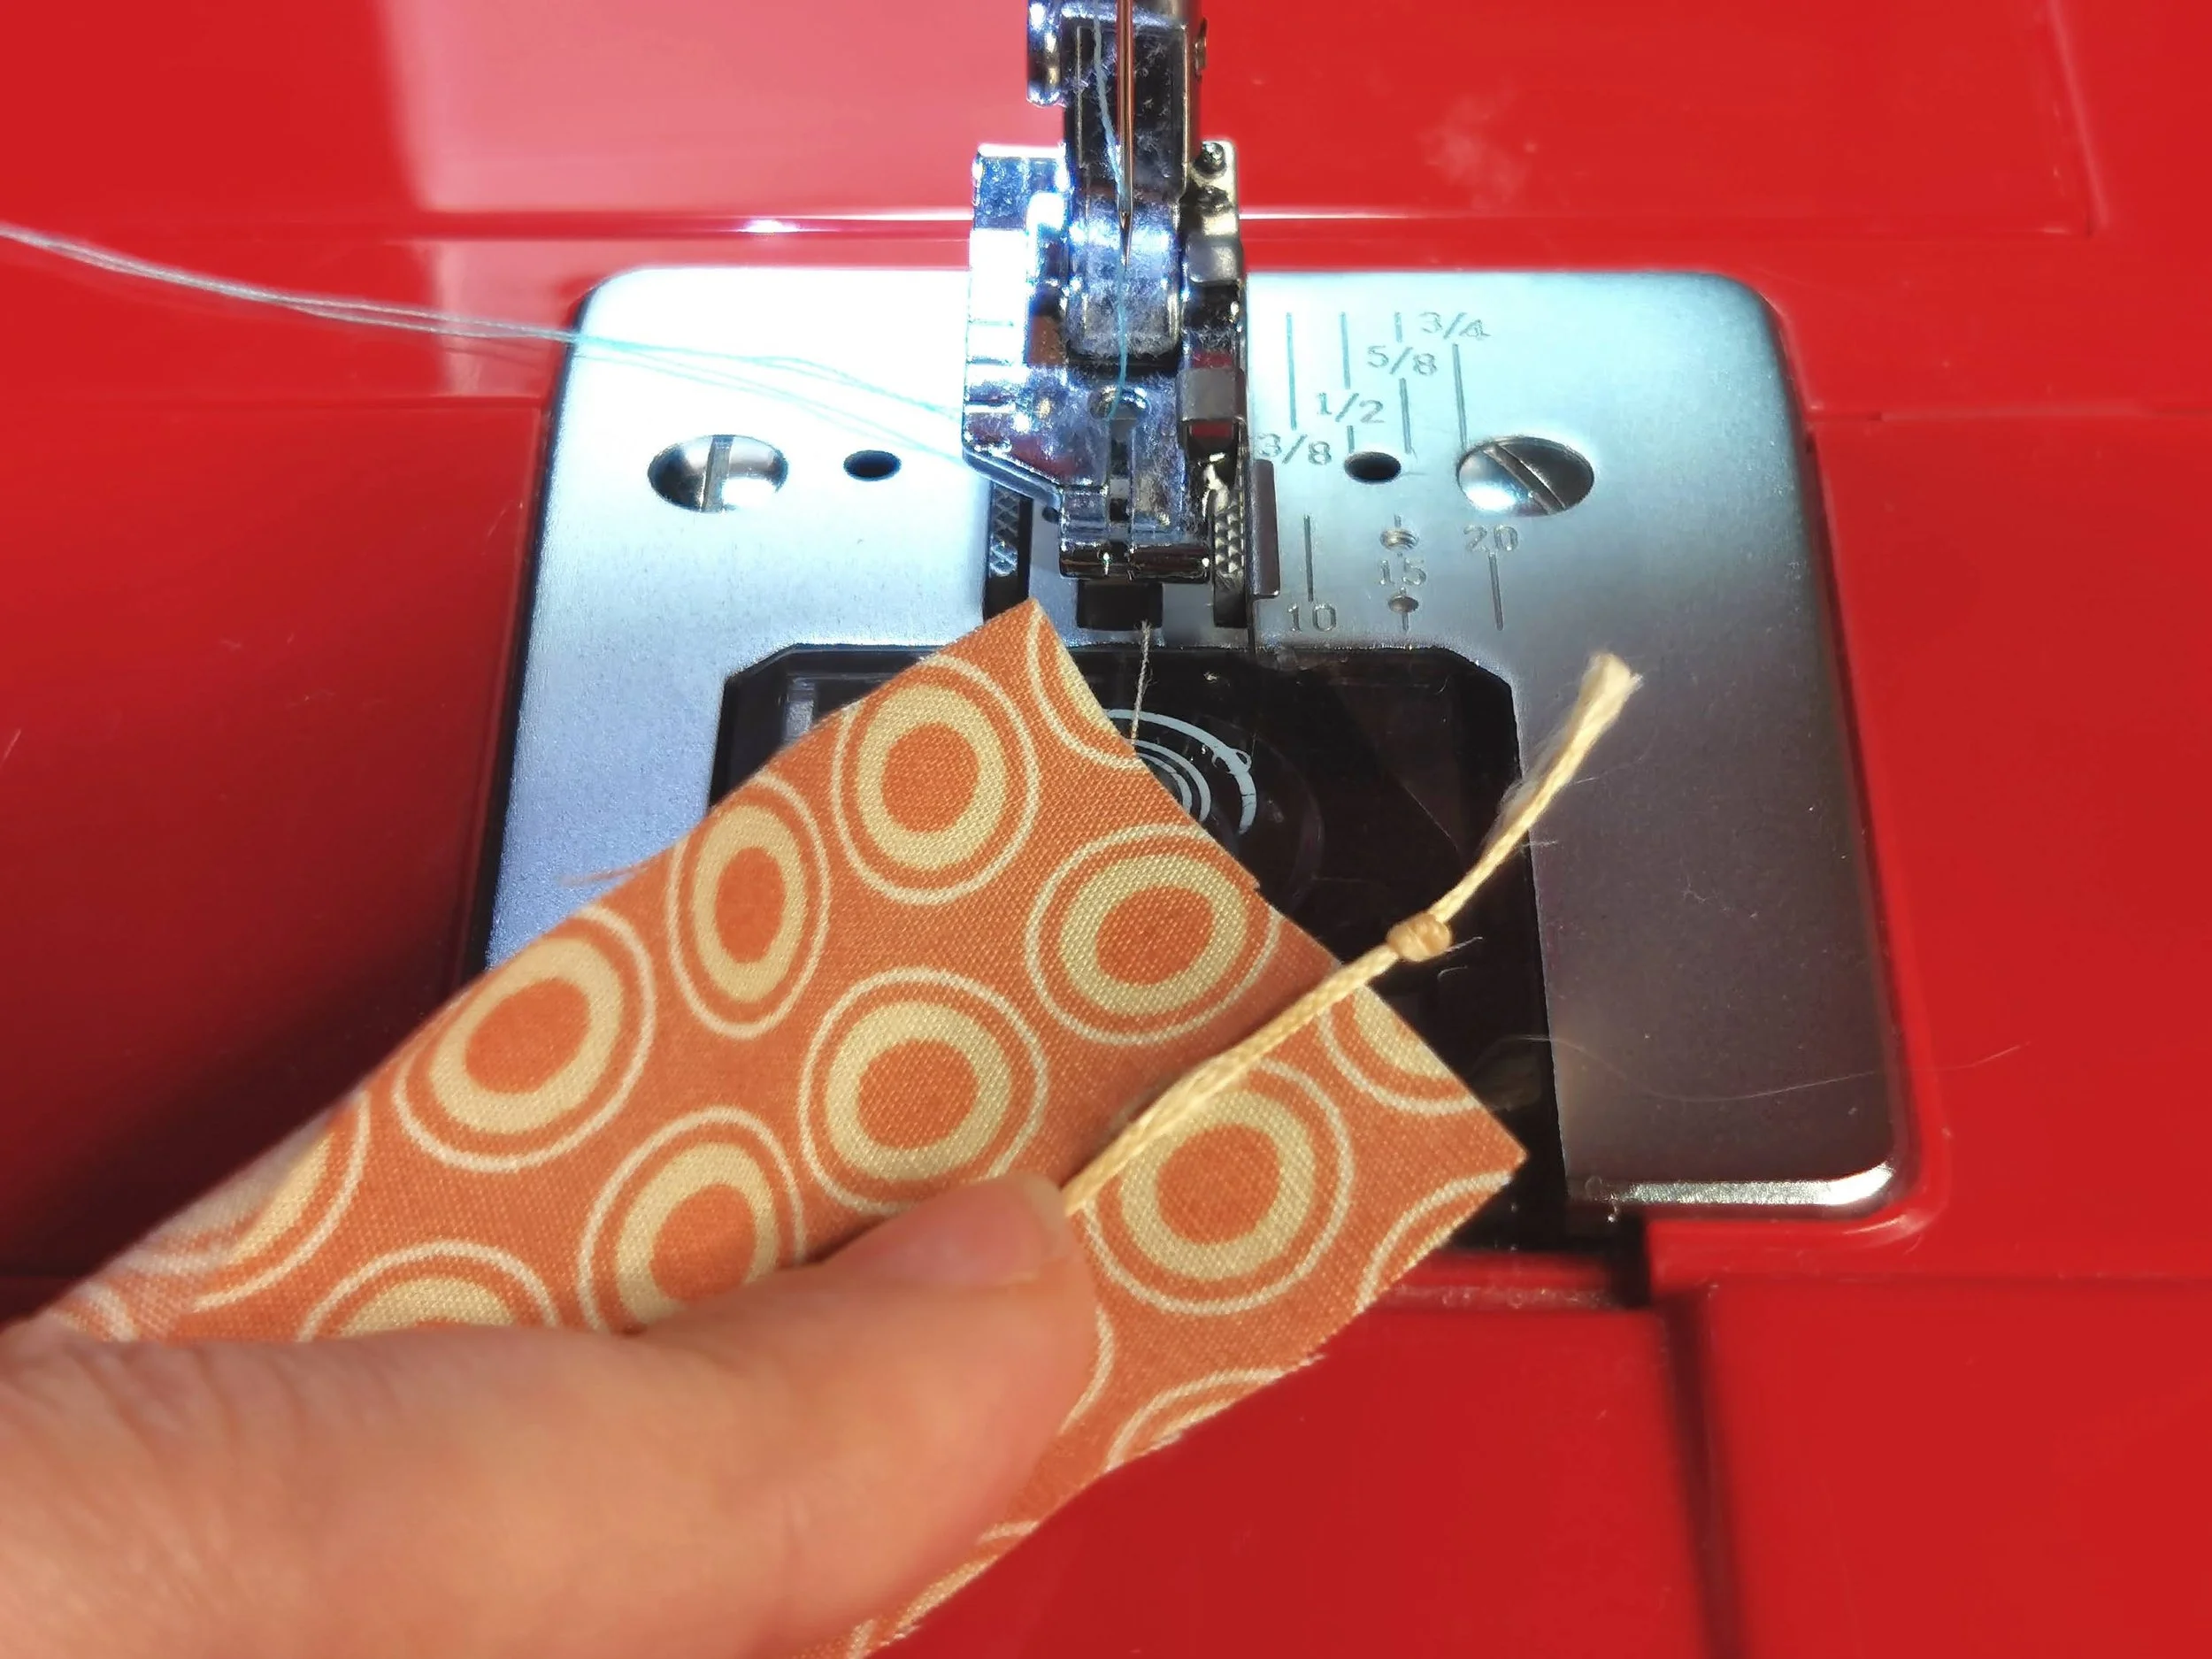
Start by knotting the end of your linen cord. There is no need to cut the cord, you can just unwind it as you need it. Place the cord so that it runs down the length of the strip, with the knot positioned just above the top edge.

Step 2
Fold the fabric strip in half, right sides together, and enclosing the cord. Start at 1/8” down from the top of the strip, stitching across the section with the cord. Reverse a couple of times to make sure the cord is caught in the stitching. Stitch forward until you are 1/4” from the end.

Step 3
With the needle down, turn your strip, and stitch down the length using a 1/4” seam allowance. As you stitch, keep the cord inside the fold, making sure it doesn’t get caught in the stitching. At the end, finish by backstitching.

Step 4
Hold the strip tightly just below the stitching at the top, and pull gently on the cord. The top will begin to be pulled down. Go slowly, and smooth the tube upwards as the top pulls downwards. If you work too quickly you will find that the outside of the tube just bunches up. If that happens, smooth it out again and start to pull slowly once more. Continue until the tube is entirely the right way round.

Step 5
Use your seam ripper to unpick the stitching at the top of the tube. Once the stitching is out, pull the cord back through the tube and wind it back onto the reel for re-use. Wriggle the top of the tube to pop the raw end out ready for pressing. Use your fingers to roll the seam to one side, making sure there are no folds and that the tube is even.
Once you have turned and pressed your tube, you can decide how to finish it off. Edge-stitching can look nice, and gives a crisp finish. After stitching (or not), you can choose to finish the end by turning under 1/4” twice, then stitching across , or simply knotting the end. I have threaded a pony bead on one of mine, as I do love beads! To attach the tie to your piece, press a hem at the other end then topstitch it in position, making sure to enclose the raw edges.

I hope that this method works for you! It is a simple solution to a fiddly task. See below for some examples of patterns that have fabric ties. Click the patterns for more information or to buy.
Happy Sewing!